8 Magical Tips For Your Magic Keyboard
🪄 + ⌨️ = 🤯

“That’s not an iPad, that’s a computer” - my best friend.
Apple would be proud.
While the Magic Keyboard + iPad might not be a full computer (iPadOS 16 might change this), it’s a powerful combination of two powerful technological devices.
Like bread and peanut butter, the iPad and Magic Keyboard work together to create something greater than the sum of the individual devices.
Without a knife, however, you can’t effectively combine bread and peanut butter.
This article is your knife - it’ll teach you eight tips and tricks that’ll improve your Magic Keyboard experience.
Increase Tracking Speed
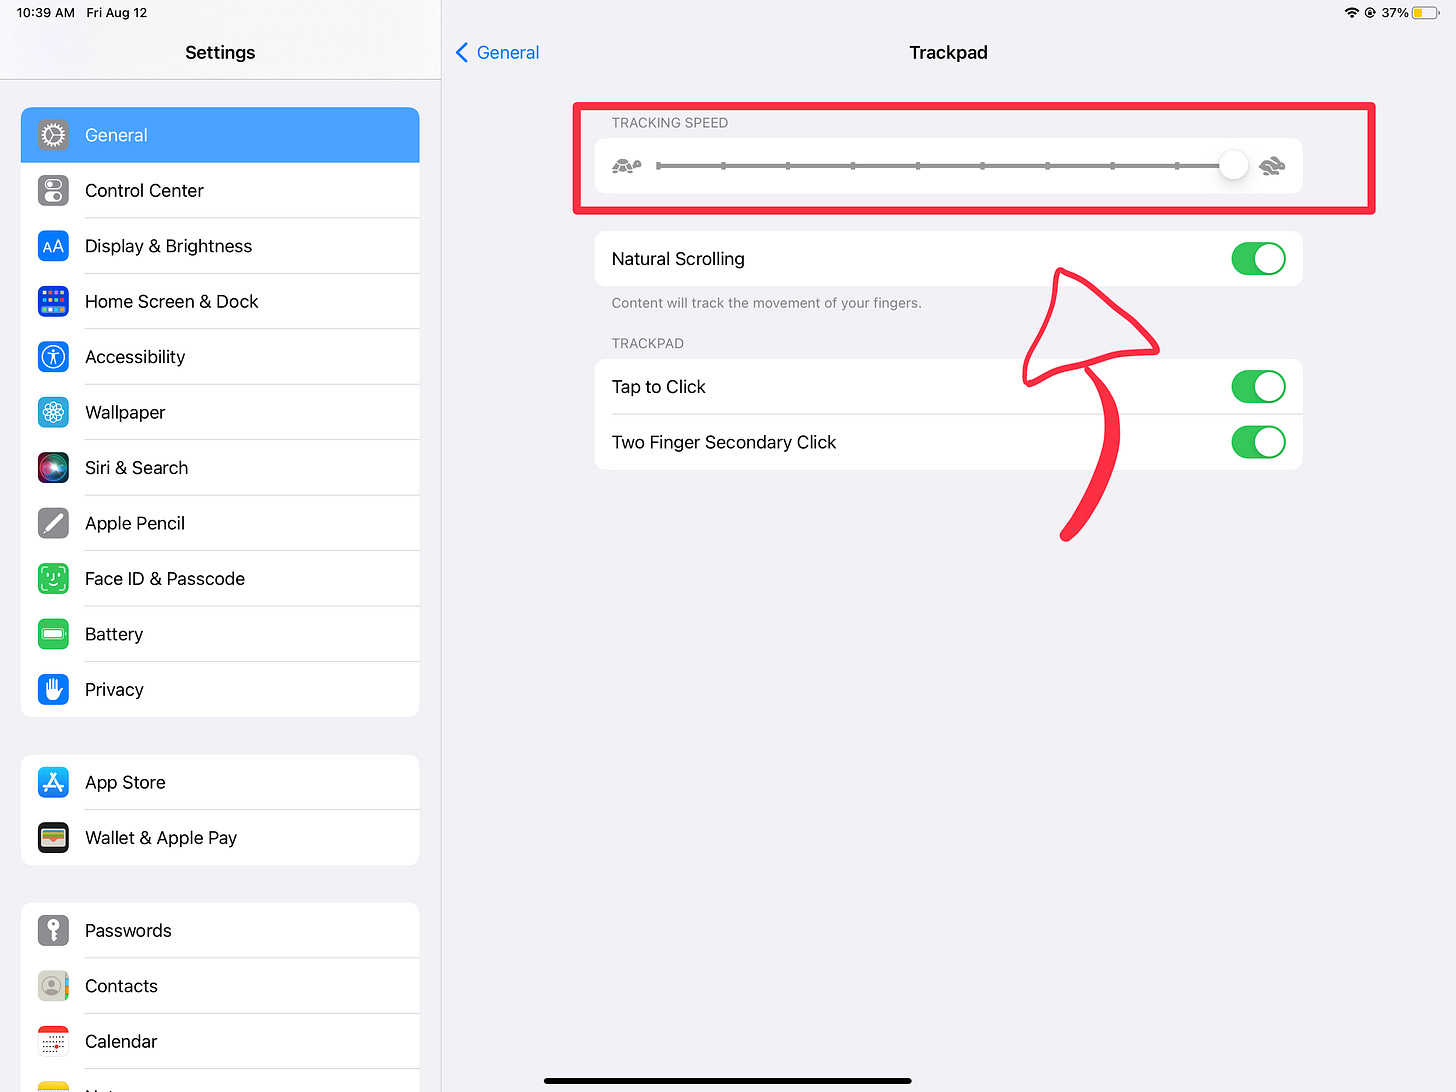
This was one of the first things I did when I got my Magic Keyboard:
Go to Settings.
General.
Trackpad.
In this case, the hare beats the tortoise every time.
With a tiny trackpad, increasing the tracking speed vastly improves the Magic Keyboard experience. Thanks to this feature, I didn’t even realize how small the trackpad actually is until I started writing this paragraph.
And, for the productive people who care about the small change, increasing your tracking speed saves a tiny increment of time as you navigate across your iPad.
Enable Tap To Click
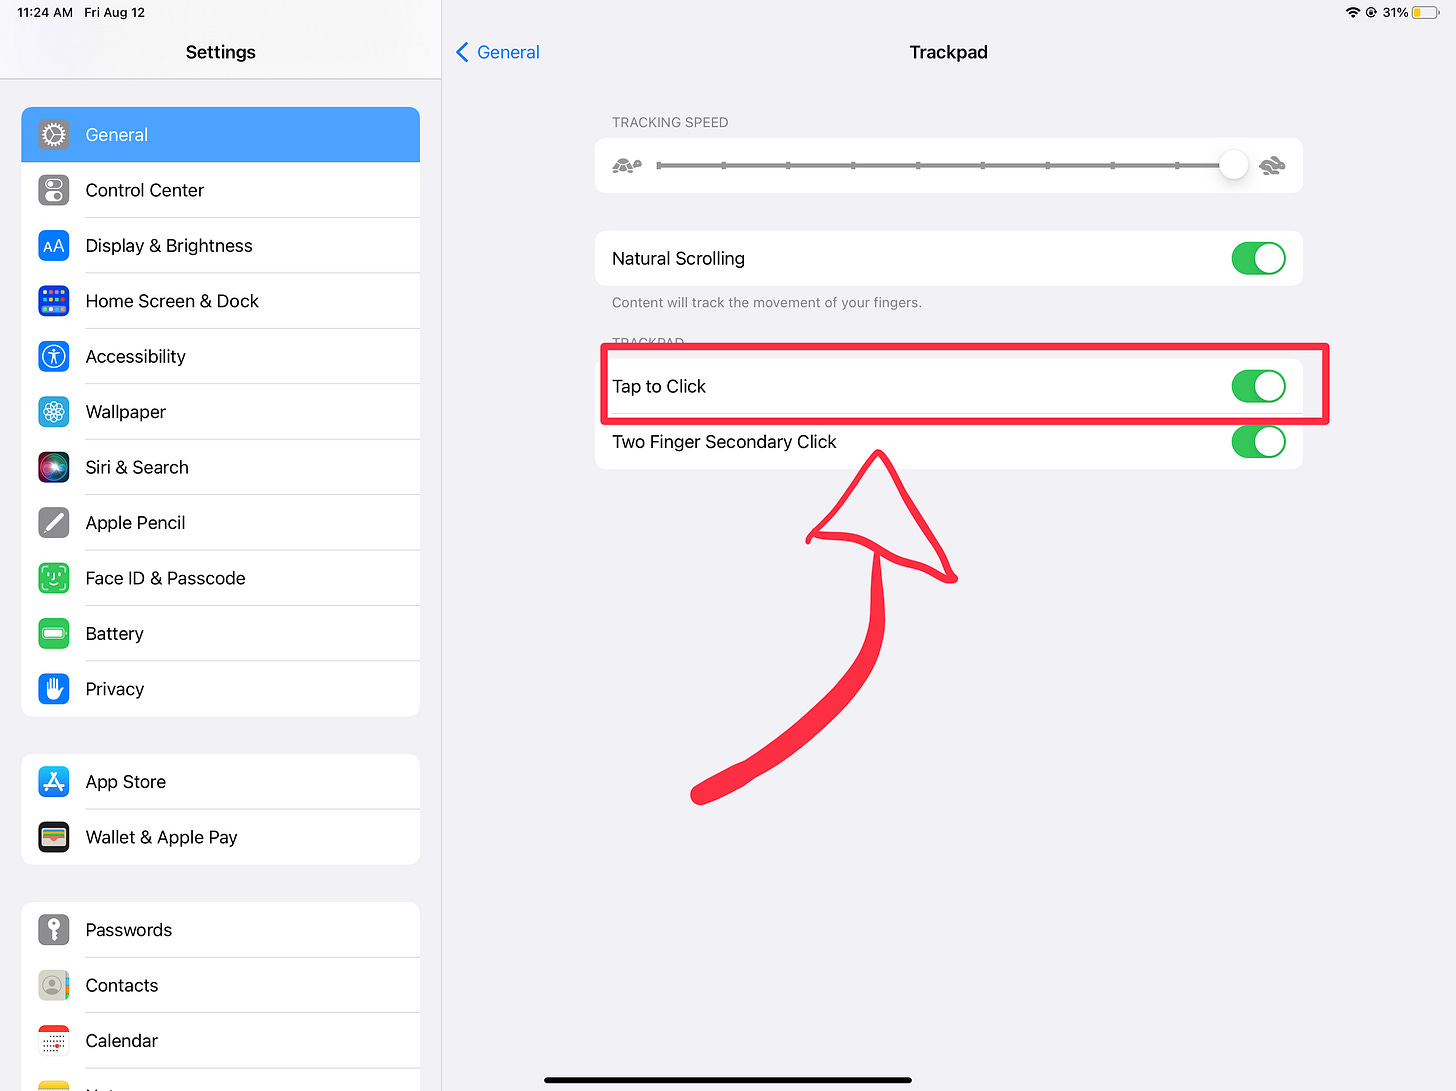
Tap to click is another must-have feature.
Instead of having to click the trackpad, you can simply tap it and your iPad will register the tap as a click.
To enable it go to Settings, then General, then Trackpad, and tap the Tap To Click option.
Trust me - enable it.
Enable Two Finger Secondary Click
Like Tap To Click, this is a must-have feature.
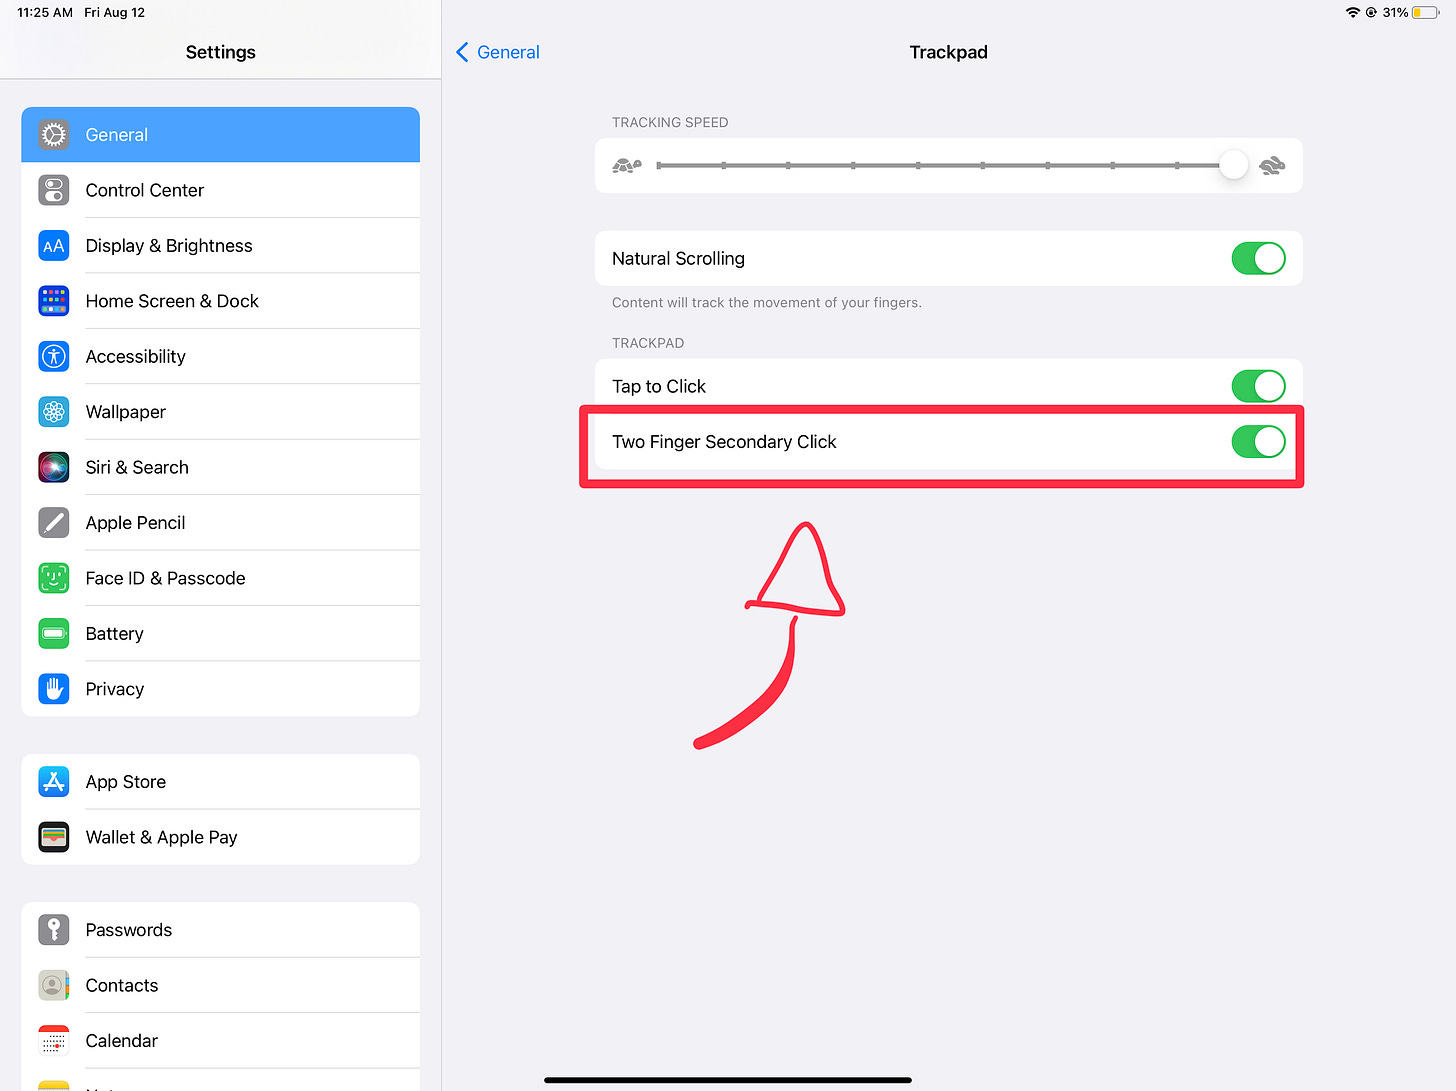
Two Finger Secondary Click essentially lets you activate a secondary click by clicking once with two fingers instead of clicking with one finger and holding the click.
To enable it, it’s almost the exact same process as enabling Tap To Click: Settings → General → Trackpad → Two Finger Secondary Click.
The cool part about Two Finger Secondary Click is that if you also enable Tap To Click, you can simply tap two fingers to activate a secondary click.
Learn Trackpad Gestures
This is yet another feature that can save you a few seconds on a daily basis.
Despite being a small change, I still think it’s crucial to know these gestures - you aren’t making the most of your Magic Keyboard without them.
Here are some of the basic gestures:
Open Dock: Swipe down with one finger
Go Home: Open the dock and swipe down again with one finger or swipe up with three fingers
Open Control Center: Swipe to the top right corner and swipe again to the top right
Open Notification Center: Swipe to the top left corner and swipe again to the top left
Open App Switcher: Swipe up with three fingers, hold for a second, and release
Switch Between Apps: Swipe to the left or to the right with three fingers
For the full list (with visual references), you can check out Apple’s User Guide for iPads.
These gestures make it far easier to navigate across your iPad - even if you aren’t concerned about improving your productivity, I’d still take some time to learn them.
Remap The Escape Key
If I’m being honest, I don’t understand the appeal of this trick (probably because I’ve only used the Escape key twice in my entire life).
For those who miss the Escape key (there isn’t one on the Magic Keyboard), you can remap the Escape key to a few other keys.
To do so, go to Settings → General → Keyboards → Hardware Keyboard → Modifier Keys.
From here, click (or tap) the key you want to change. Usually, most people use the Caps Lock key.
Try “Easel Mode”
This is another trick I don’t really use much - the “easel mode” of the Magic Keyboard.
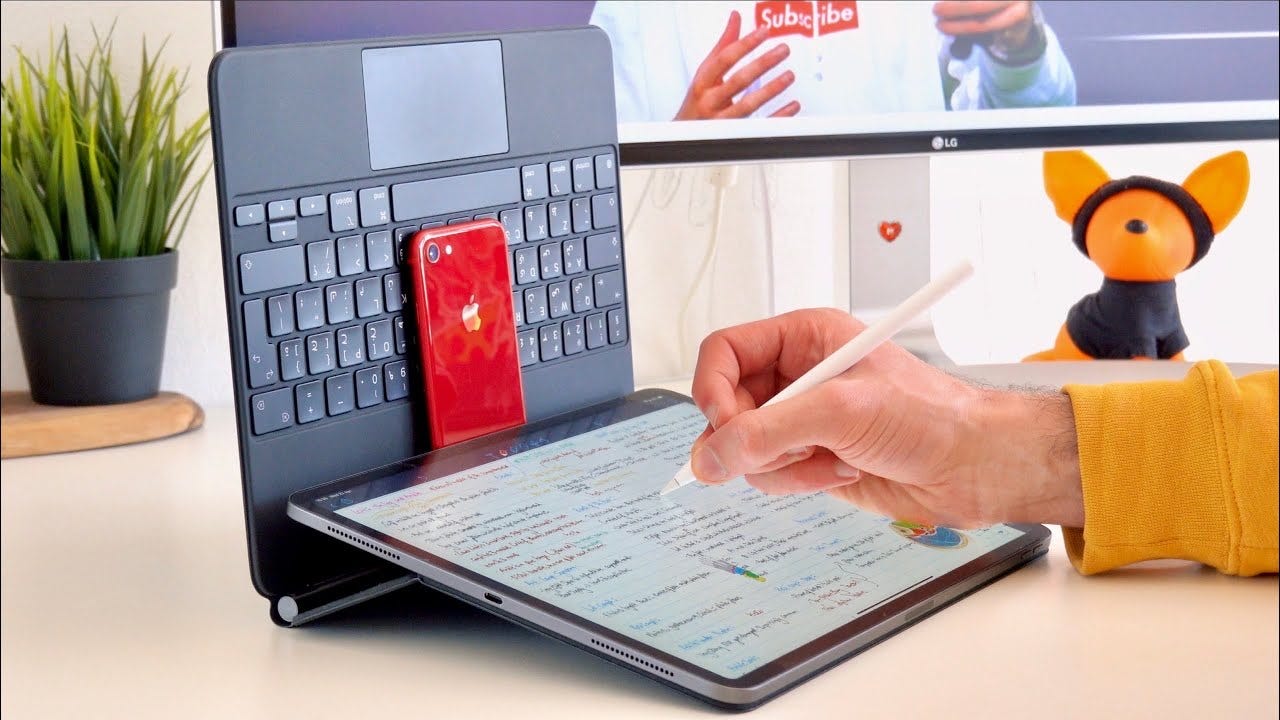
Here’s a photo of how to activate easel mode with your Magic Keyboard:
It’s a simple setup - you’ll need your iPad, a Magic Keyboard, and some kind of object that fits between the iPad and the base of the keyboard. This object will stop the iPad from falling into a completely flat position.
When I used to do this, I would use my iPhone 8, which fit perfectly.
My problem with this is that it’s a little weird. I tried using it during distance learning, and it basically meant that the bottom of my iPad’s keyboard was taking up half of the camera space.
I tried it during in-person school as well, but it’s just not worth the hassle (at least for me).
Instead, I remove the iPad, close the Magic Keyboard, and place the iPad on top of the keyboard. This provides a bit of protection for the iPad if I place it on a desk or a table.
For more information on Easel Mode, you can check out Kharma Medic’s video.
Explore The Command Key
In iPadOS, the Command key is a powerful tool.
With many different shortcuts, the Command key can, like the other tips, help you navigate across your iPad.
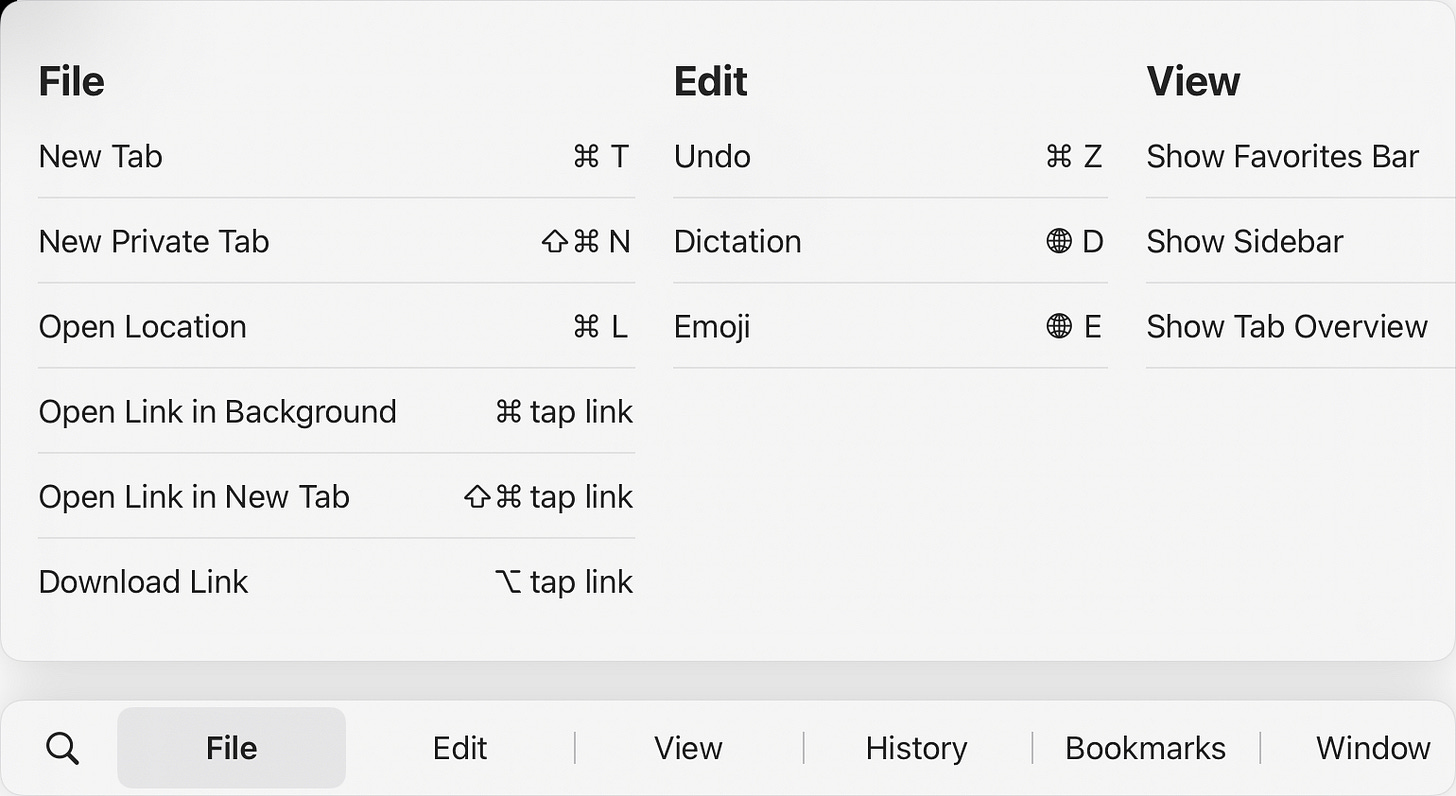
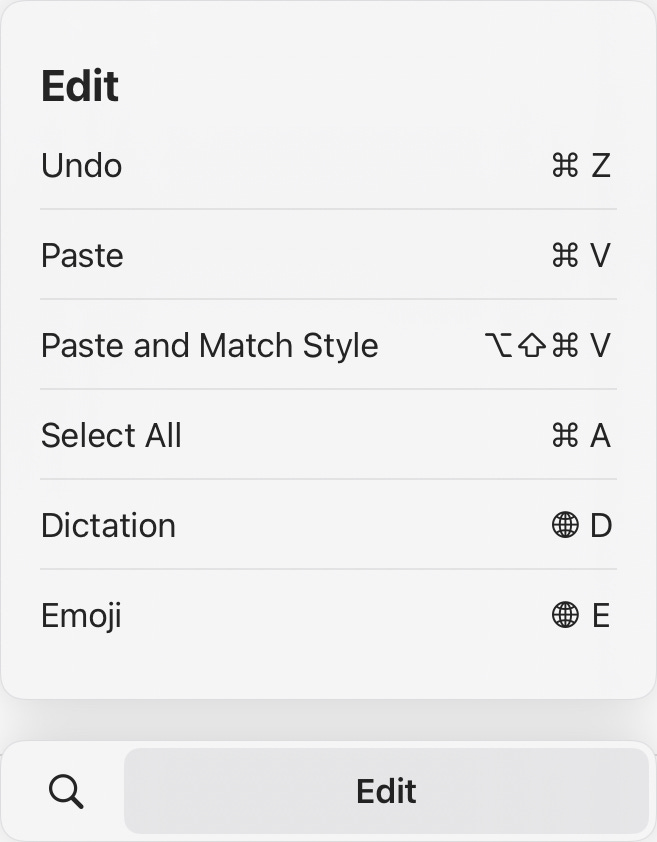
What’s special about the Command key, however, is that different apps have different shortcuts offered. To check the shortcuts offered, simply hold the Command key.
Here’s Safari:
Here’s Spark:
And here’s Notion:
There are some universal shortcuts too. For instance, pressing Cmd + space will open up Spotlight Search.
Realistically speaking, no one is going to memorize all of these shortcuts (not even you). I’d recommend finding a few shortcuts that are genuinely useful for you (something you would use multiple times a day) and memorizing them.
Note: I was a little shocked when I wrote up this part. I knew Safari and a few other Apple apps had Command key shortcuts, but I never expected Notion or Spark to have them.
Explore The Globe Key
The Globe key is similar to the Command key - it acts as a shortcut key that enables to quickly do specific actions.
What’s different about the Globe key, however, is its focus on universal shortcuts. Rather than having specific shortcuts for specific apps (like the Command key), the Globe key offers global shortcuts (like navigation or multitasking).
For more information, you can check one of my earlier posts on the Globe key from a while ago (might be familiar - around 15% of you joined Overoptimize because of this post).
Final Thoughts
There you go - 8 tips to help you maximize your Magic Keyboard. I know this post didn’t have too many little-known tips, but hopefully you got some value from this list.
Thanks for reading!
Adi


